How to Apply for a Visa to Go to Israel?
Planning a trip to Israel? Whether you’re heading there for tourism, business, or family visits, one of the first steps is getting your visa sorted. Israel has made the visa process more convenient with the introduction of ETA-IL and eVisa B2. These digital options eliminate the hassle of paperwork and long queues, making your journey smoother from the start.
Let’s explore how to apply for a evisa to go to Israel, and understand the difference between ETA-IL and eVisa B2.
Introduction: What Is an Israel Visa?
An Israel eVisa is an electronic travel authorization that allows eligible travelers to enter Israel for a short period. Instead of applying with physical documents, travelers can now complete the process online. Israel currently offers two types of electronic permits:
ETA-IL: An Electronic Travel Authorization for travelers from visa-exempt countries.
eVisa B2: An online visa for travelers who are not eligible for ETA-IL and require pre-approval before entry.
Who Can Apply for an Israel Visa?
Israel has created these two digital options to cater to different categories of travelers:
1. ETA-IL Eligible Travelers
If you're from a country that previously didn't need a visa to visit Israel (like the U.S., Canada, or many European nations), you may now need to apply for ETA-IL before your trip. This isn’t a traditional visa—it’s a travel authorization linked to your passport.
2. eVisa B2 Applicants
Travelers from non-visa-exempt countries need to apply for an eVisa B2. This is a standard tourist visa, but the good news is it’s now available online. Instead of going through a time-consuming manual process, you can apply digitally and receive the visa by email.
Types of Israel Visas Available
Here’s a quick comparison between ETA-IL and eVisa B2 to help you understand which one applies to your situation:
Visa Type | Who Should Apply? | Purpose | Validity |
ETA-IL | Visa-exempt travelers | Tourism, short visits | Up to 90 days |
eVisa B2 | Visa-required travelers | Tourism, family visits | Usually up to 90 days |
Step-by-Step Process to Apply for an Israel eVisa
Let’s break down how to apply for a visa to go to Israel, whether you need ETA-IL or eVisa B2.
For ETA-IL
Check Eligibility
Confirm your country is eligible for ETA-IL. This is mandatory even if you’ve previously entered Israel without a visa.Fill Out Online Form
Provide your personal details, travel information, and passport data.Pay the Authorization Fee
Submit payment online via secure methods.Wait for Email Confirmation
Once approved, the ETA-IL will be linked to your passport and emailed to you. No printout is necessary at the airport.Travel to Israel
Present your passport on arrival. Immigration officials can see your ETA-IL status electronically.
For eVisa B2
Gather Required Documents
You’ll need a passport, a passport-sized photo, travel plans, and possibly an invitation letter or proof of funds.Complete the Online Application
Fill in the eVisa B2 application form with accurate details.Upload Supporting Documents
Submit your passport copy, photograph, and other documents as required.Pay the Application Fee
Make the payment online. You’ll get a confirmation receipt.Wait for Processing
Processing times vary. You’ll receive the visa by email once approved.Print and Carry Your Visa
Unlike ETA-IL, it’s advisable to carry a printed copy of your eVisa B2 for inspection at immigration.
Documents Required for Israel eVisa
Whether you’re applying for ETA-IL or eVisa B2, it’s important to prepare the necessary documents in advance. Here’s a list:
For ETA-IL:
Valid passport (with at least 6 months validity)
Recent photo (passport-style)
Email address for receiving approval
Payment method (credit/debit card)
For eVisa B2:
Valid passport
Passport-size photo
Travel itinerary or flight booking
Proof of accommodation
Bank statement or proof of financial means
Invitation letter (if applicable)
Health/travel insurance details
5 Famous Places to Visit in Israel
Once your visa is sorted, it’s time to explore! Here are five incredible destinations in Israel you won’t want to miss:
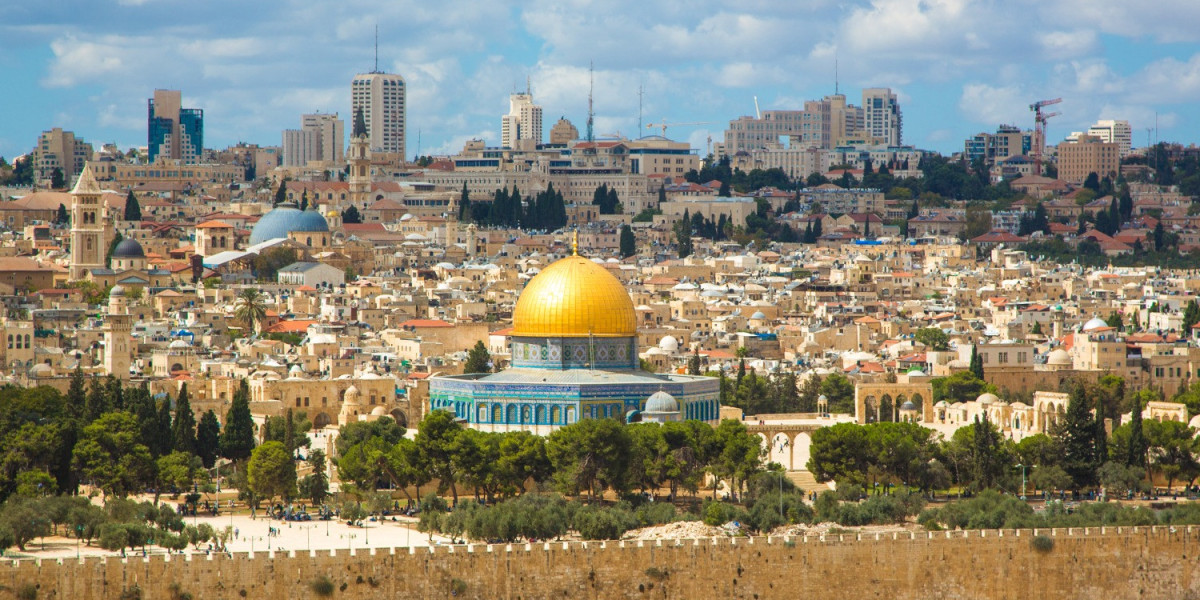
1. Jerusalem
Step into history with ancient sites like the Western Wall, Church of the Holy Sepulchre, and the Dome of the Rock.
2. Tel Aviv
Enjoy vibrant nightlife, Mediterranean beaches, and a buzzing food scene in Israel’s most modern city.
3. Bethlehem
Visit the birthplace of Jesus and explore its charming old town and religious landmarks.
4. Dead Sea
Float effortlessly in the mineral-rich waters of this natural wonder located at the earth’s lowest point.
5. Sea of Galilee
A peaceful spot with spiritual significance, ideal for boat rides and lakeside relaxation.
Final Thoughts
Now that you know how to apply for a evisa to go to Israel, choosing between ETA-IL and eVisa B2 depends on your nationality. Both processes are straightforward and designed for traveler convenience. So get your travel documents ready, complete your online application, and prepare to explore one of the most fascinating countries in the world!
Whether it’s history, culture, religion, or nature that draws you in—Israel has something unforgettable for every traveler.